How could this be helpful? Here's an example: As the Athletic Director, you may have access to a range of media assets (athletic photos, your school's official logos, etc.). However, your coaches who are posting their own content do not easily have access to this media. Therefore, they may be sharing content using low quality photos and even the wrong school logos! By using the Your Teams feature, you can now quickly and easily share your own media with anyone within your program using Gipper. Coaches can now use this media to create high quality content directly from their phone, computer, or tablet! As mentioned above, this has two major benefits:
1. SAVES TIME
As an AD, you no longer have to spend your time searching and sharing for media to send to your coaches by email, text, etc. As a coach, you don't have to waste time scouring the internet for high quality photos and official media assets. 2. IMPROVES QUALITY OF CONTENT AND BRANDING
Because your coaches have easy access to official athletic assets and high quality photos - the content being shared is going to look much better - and stay in line with your brand guidelines.
Below, you will learn how to use Your Teams to full effect on Gipper.
Creating a Team
To access Your Teams, click on the section right underneath Your Gallery in the menu on the left side of the screen. Shown below:
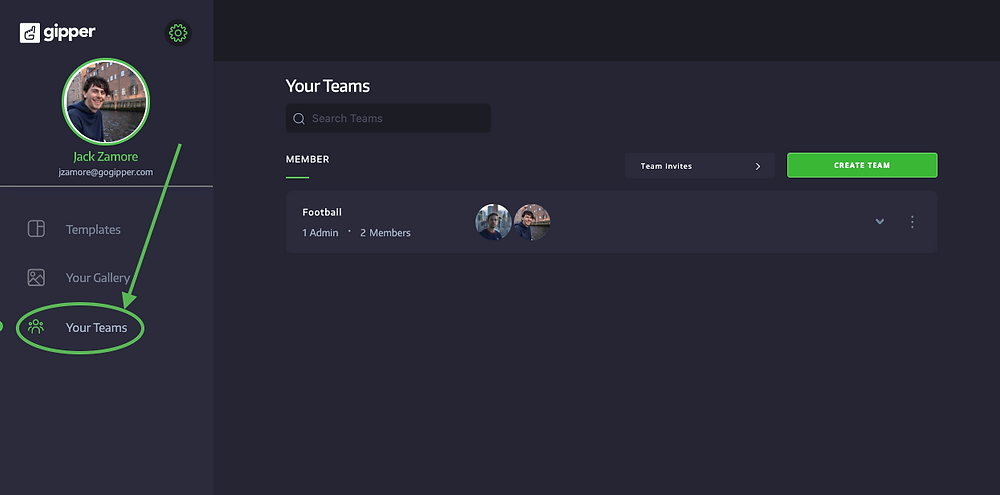
As is shown, I'm already a part of a team called "Football" and to create a new team, just simply click the green button on the top right of the page. This will open up a small menu to name the team, and you can invite any members by entering their email addresses. This is shown below:
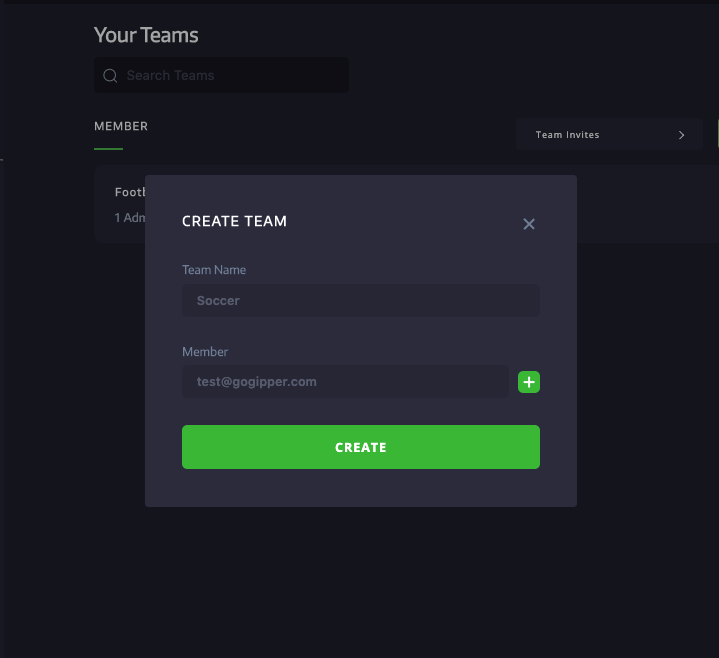
After clicking "Create", as is shown above, you can create a team titled anything you'd like. I've created a "Soccer" folder. Now, you can invite anyone you'd like to join this team. Upon accepting their invite, they will have access to any of the photos or folders that you have shared with that team.
Sharing Media with Teams
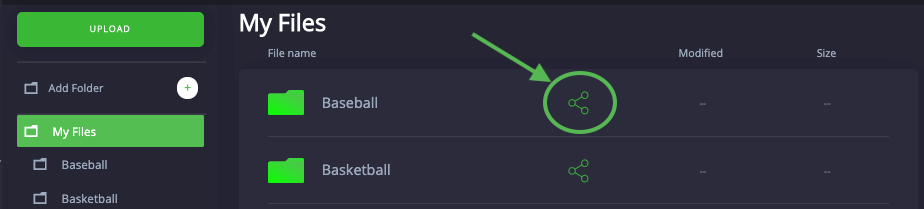
To share a photo or folder with a particular team, simply go to Your Gallery (shown below). For everything under "My Files", there is a trio of green circles in the row to its right. If you click on the symbol corresponding to any of these files, you will be able to click to share that file with any of Your Teams.
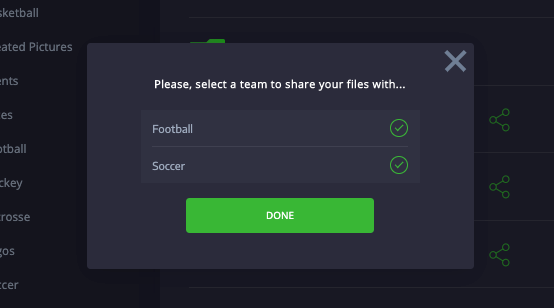
Just simply click on the circle next to the team (or teams) that you wish to share that file with. This will grant any team members access to those files within their own gallery on their Gipper account. Shown below:
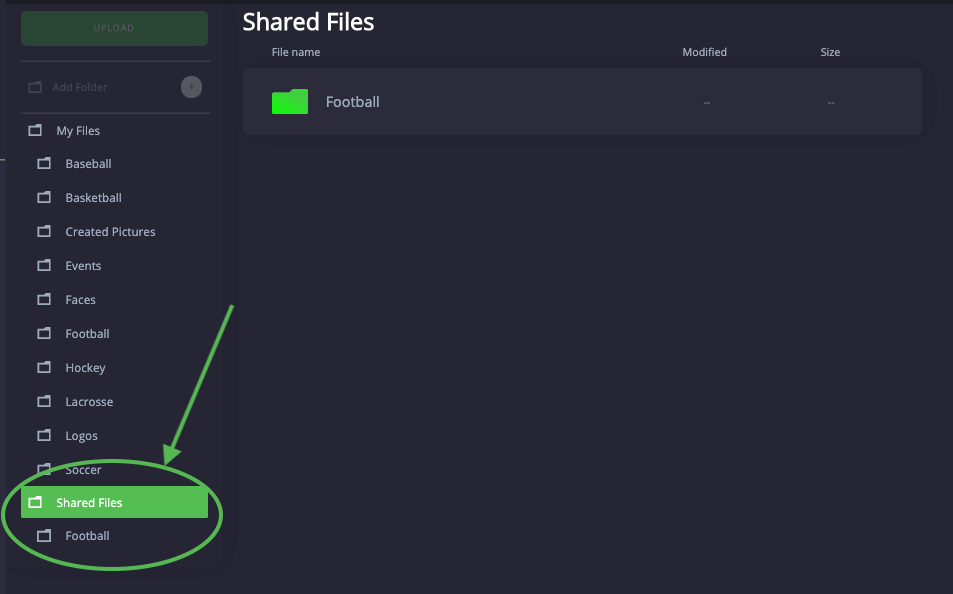
Now, these added members have access to this folder. How do they access it? In the menu on the left side of Your Gallery, all of your folders within "My Files" are listed. Below these, there is a folder titled "Shared Files" which contains any files that have been shared with you by other Gipper users. This is shown below:
Best part about this? Any of these files can be accessed right within the template editing section for use in any template available on the platform. Altogether, this allows you and your colleagues to super easily share and organize photos - helping everybody produce better content for your social media feeds.
I hope this article was helpful for getting you started with Teams. If you have any questions about any of the topics covered, don't hesitate to reach out to us at support@gogipper.com and we'll be sure to get back to you right away!
Thanks so much for reading and Go Gipper!
- Jack
Jack Zamore is the Chief Marketing Officer at Gipper. Gipper is a platform that helps high school athletic departments create professional sports graphics for social media - in seconds, on any device, and without needing any design experience.
Learn more @ gogipper.com/athletics